
Sponsored
DIY Barn Quilt Table
Using Unicorn Spit colored gel stains and wood shims to create a custom wood table
Choosing your base
*This post is sponsored by Unicorn SPiT, but all statements and opinions are mine.
A while back I had refinished a coffee table for a friend and replaced the old worn out top with reclaimed wood. I never throw things away and still held onto the old top. I also had a set of hairpin legs laying around from another table I had taken apart. While cleaning up a few things in my work area I decided to put those odds and end to good use and build a new table.
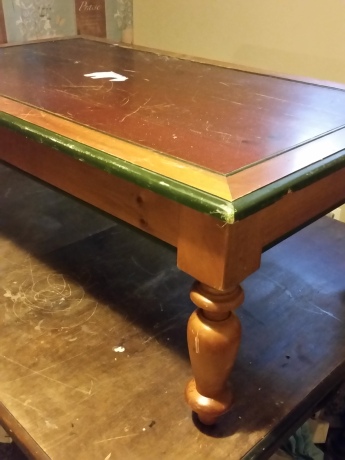
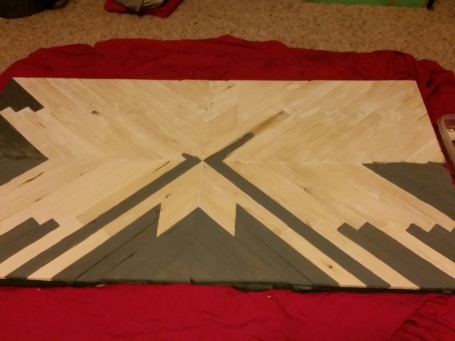
Using the top of this old coffee table as the base I started by first sanding and painting a coat of Cece Caldwell’s Beckley Coal. Then measuring and marking lines for the center of the table. Once I had the center marked, I started cutting my wood shims for the center design at a 45 degree angle on one end. Then using wood glue and an 18 gauge brad nailer, attached them in double layers in the arrow pattern from the center out.
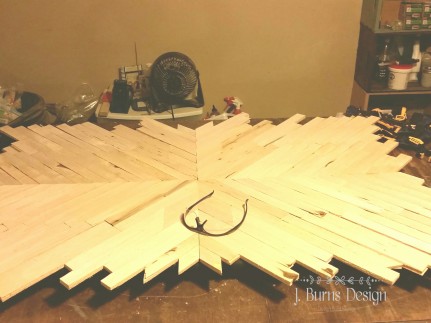
I did not pre-stain the shims before nailing them because I knew I would be trimming and sanding them after the glue was dry. It didn’t make sense to double my work when I can do it correctly the first time.
Then using a chalk line and a drafting square, I snapped chalk lines for each edge of the table to be a guide for trimming off the edges.
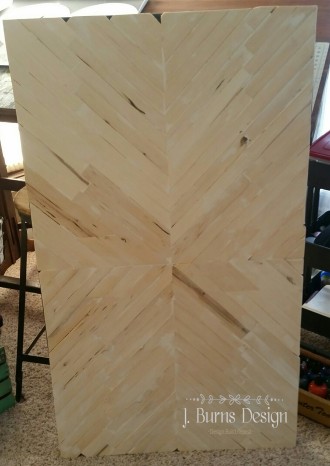
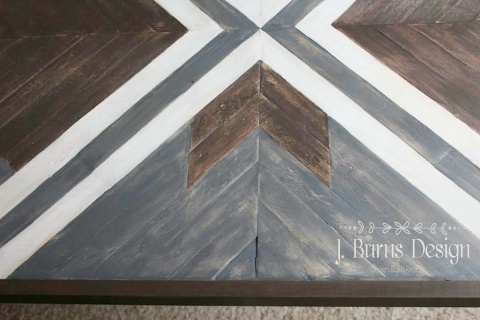
Once I had the sides trimmed with the circular saw, I filled and sanded any gaps and nail holes. After I cleaned off all the dust with a microfiber cloth, I grabbed a few colors of Unicorn SPiT colored gel stains.
I started with Weathered Daydream. Then added Rustic Reality and White Ning.
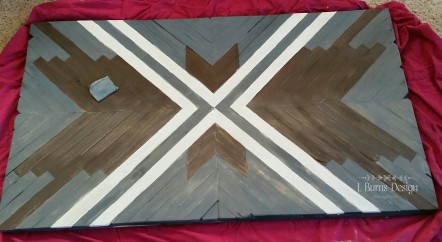
Using 1 x 2, I measured for my miter cuts to trim out the edges of the table.
A little more sanding and I stained the trim with Rustic Reality. I attached the hairpin legs with 1” Spax screws, which by the way are the best thing since sliced bread!!
I did a light sanding over the entire table to even out the colors and to give it more of the worn barn quilt look.

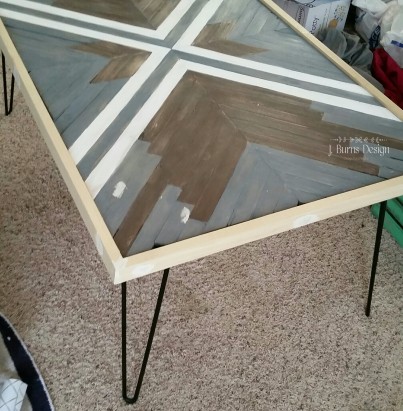
After I was happy with the color I put on one quick coat of a shellac wash coat (50/50 denatured alcohol and shellac). Once that was dry I finished the entire table with a few coats of Black Dog Salvage Guard Dog sealer in matte.
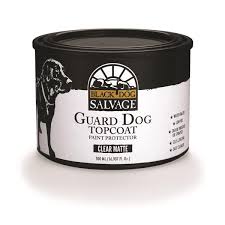
This stuff is quickly becoming one of my favorite protective finishes. It’s super easy to use, self leveling and water based for easy clean up.
I let that dry an hour between each coat and only lightly sanded with 400 wet/dry before the last coat.


In the end I used 4 packs of wooden contractor shims and (2) 1 x 2 x 8 boards.


Love it!!!
Beautiful and well done work..
LikeLike
Thanks Maria!
LikeLike
Love wood. Love quilts. LOVE THIS!!!
LikeLike
Thank you!
LikeLike
Wonderful piece and thanks for making the instructions so easy to follow!
LikeLike
Thanks Diane!
LikeLike
I love ALL of your work! Thanks for giving me all these ideas for using wood shims!
LikeLike
Love the design and the colors you did.
LikeLike
Absolutely beautiful! Love love live Unicorn Spit!,
LikeLike
Love it Jen!
LikeLike